
With spring really trying to pop its head up, Mother’s Day this weekend, and Easter hopping round the corner, our Monthly Motivation project for March is the perfect way to add a creative touch to your celebrations or simply elevate your ‘everyday’ treats: piped chocolate flower decorations.
This style of edible chocolate decoration is often called a piped runout, transfer, or sticker. There are a few steps involved but, once you’ve got the hang of it, they’re quite easy and simple to create, and so effective once set and placed on a cupcake or dessert. They’re also a brilliant way to add a handmade finish to shop-bought Easter Eggs – making them extra special (yes, I did have to resist the obvious pun there!).
Ingredients:
~ Around 100g of white chocolate
~ One or two food colouring powders in your choice of colour(s)
Tools/equipment:
~ A simple flower template
~ A sturdy, flat surface (like a clean cake board or baking tray)
~ Sticky tape
~ Non-stick baking paper
~ A couple of heatproof bowls
~ Boiling water
~ A couple of teaspoons
~ Clean scissors
~ The optional extra of ready-made piping bags if you don’t want to make your own
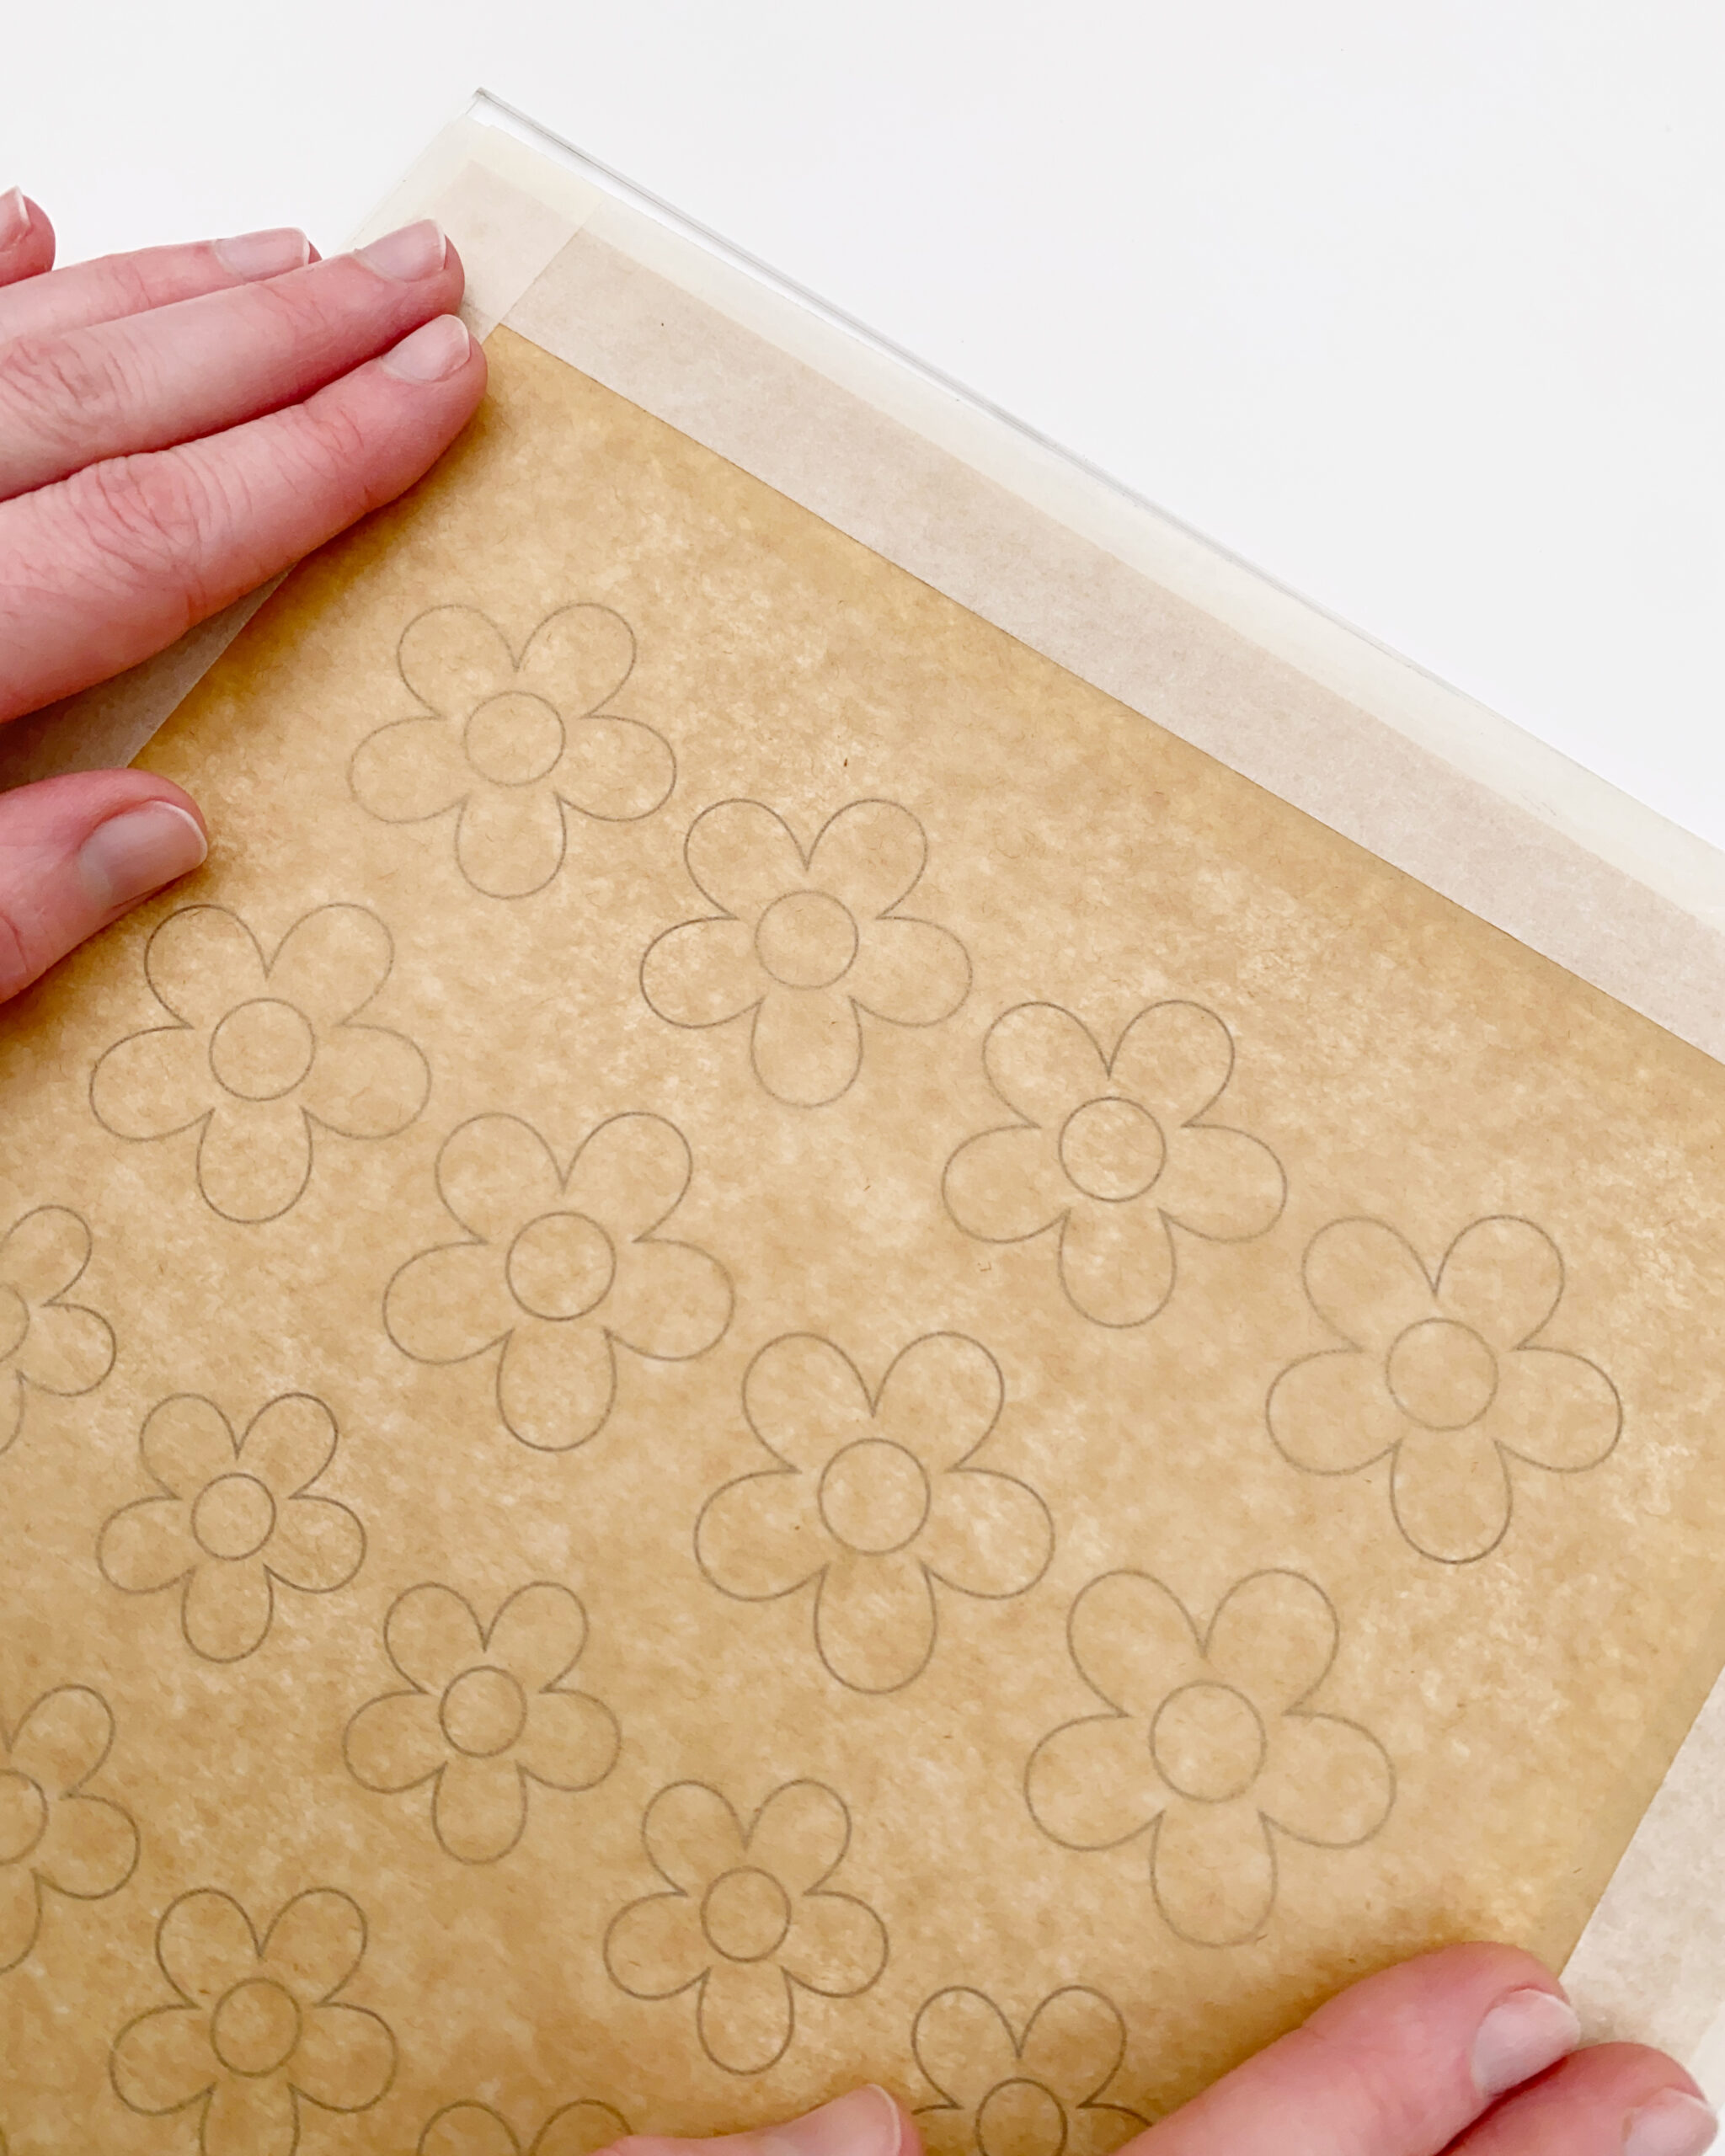
Step One: Click here to download and print out your free copy of our simple flower template, with three flower sizes (it’s designed for A4 portrait paper)*. Alternatively, create your own template on basic paper.
Step Two: Tape your template to a flat, sturdy surface, that you can put to one side later.
Step Three: Tape a piece of non-stick baking paper over the top of the template (shiny side up) – making sure you pull the baking paper tight so it’s completely flat. Tape all sides so it cannot move. You should be able to clearly see the template through the baking paper.
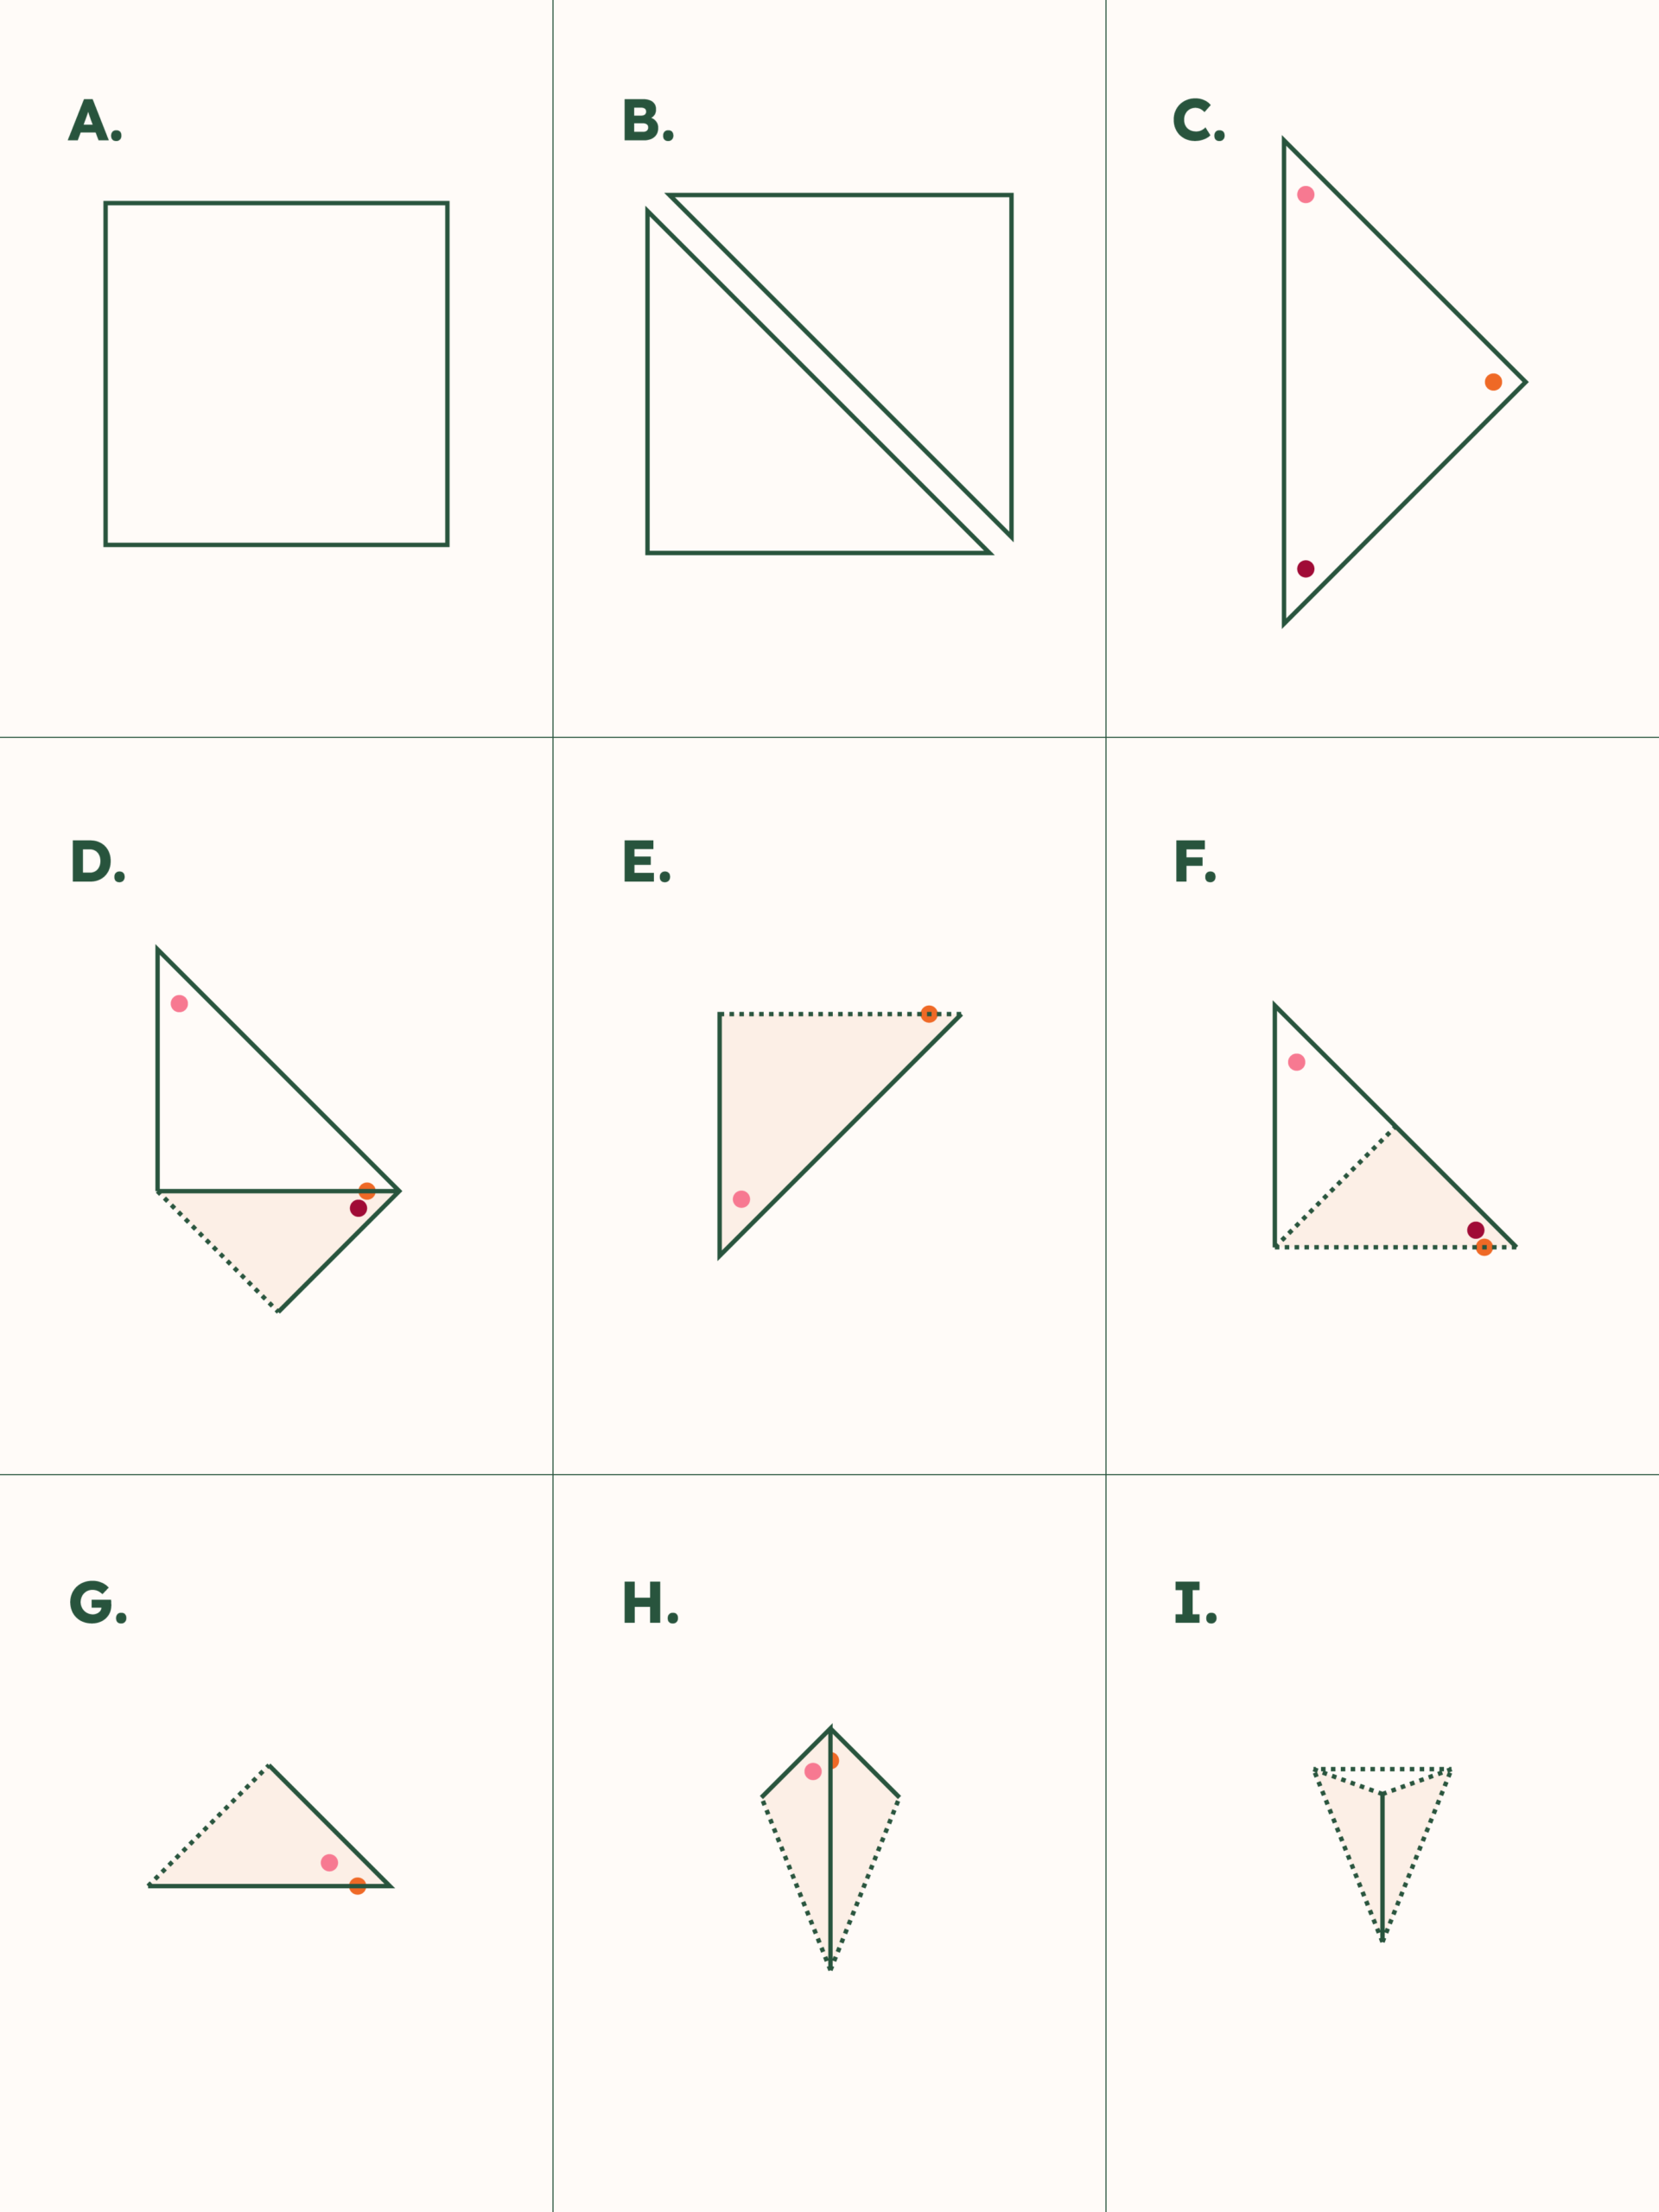
Step Four: Make some piping bags. This is arguably the hardest step in the whole process, so if you want to cheat (I won’t tell anyone!) you can buy ready made bags instead. But, if you want to make your own… cut a large square of non-stick baking paper, then cut the square diagonally in half creating two triangles. Place the triangle on a worktop with the long edge vertical (a point at each end) and the shorter point out to the side.
Lift the bottom point and fold the bottom half of the triangle in half – so that the bottom point roughly meets the side point. Now fold the top half of the triangle over the bottom folded section. Flip the piece over. You should have a single point at the top – lift it up and fold it over the folded section – so that the point roughly meets the other points.
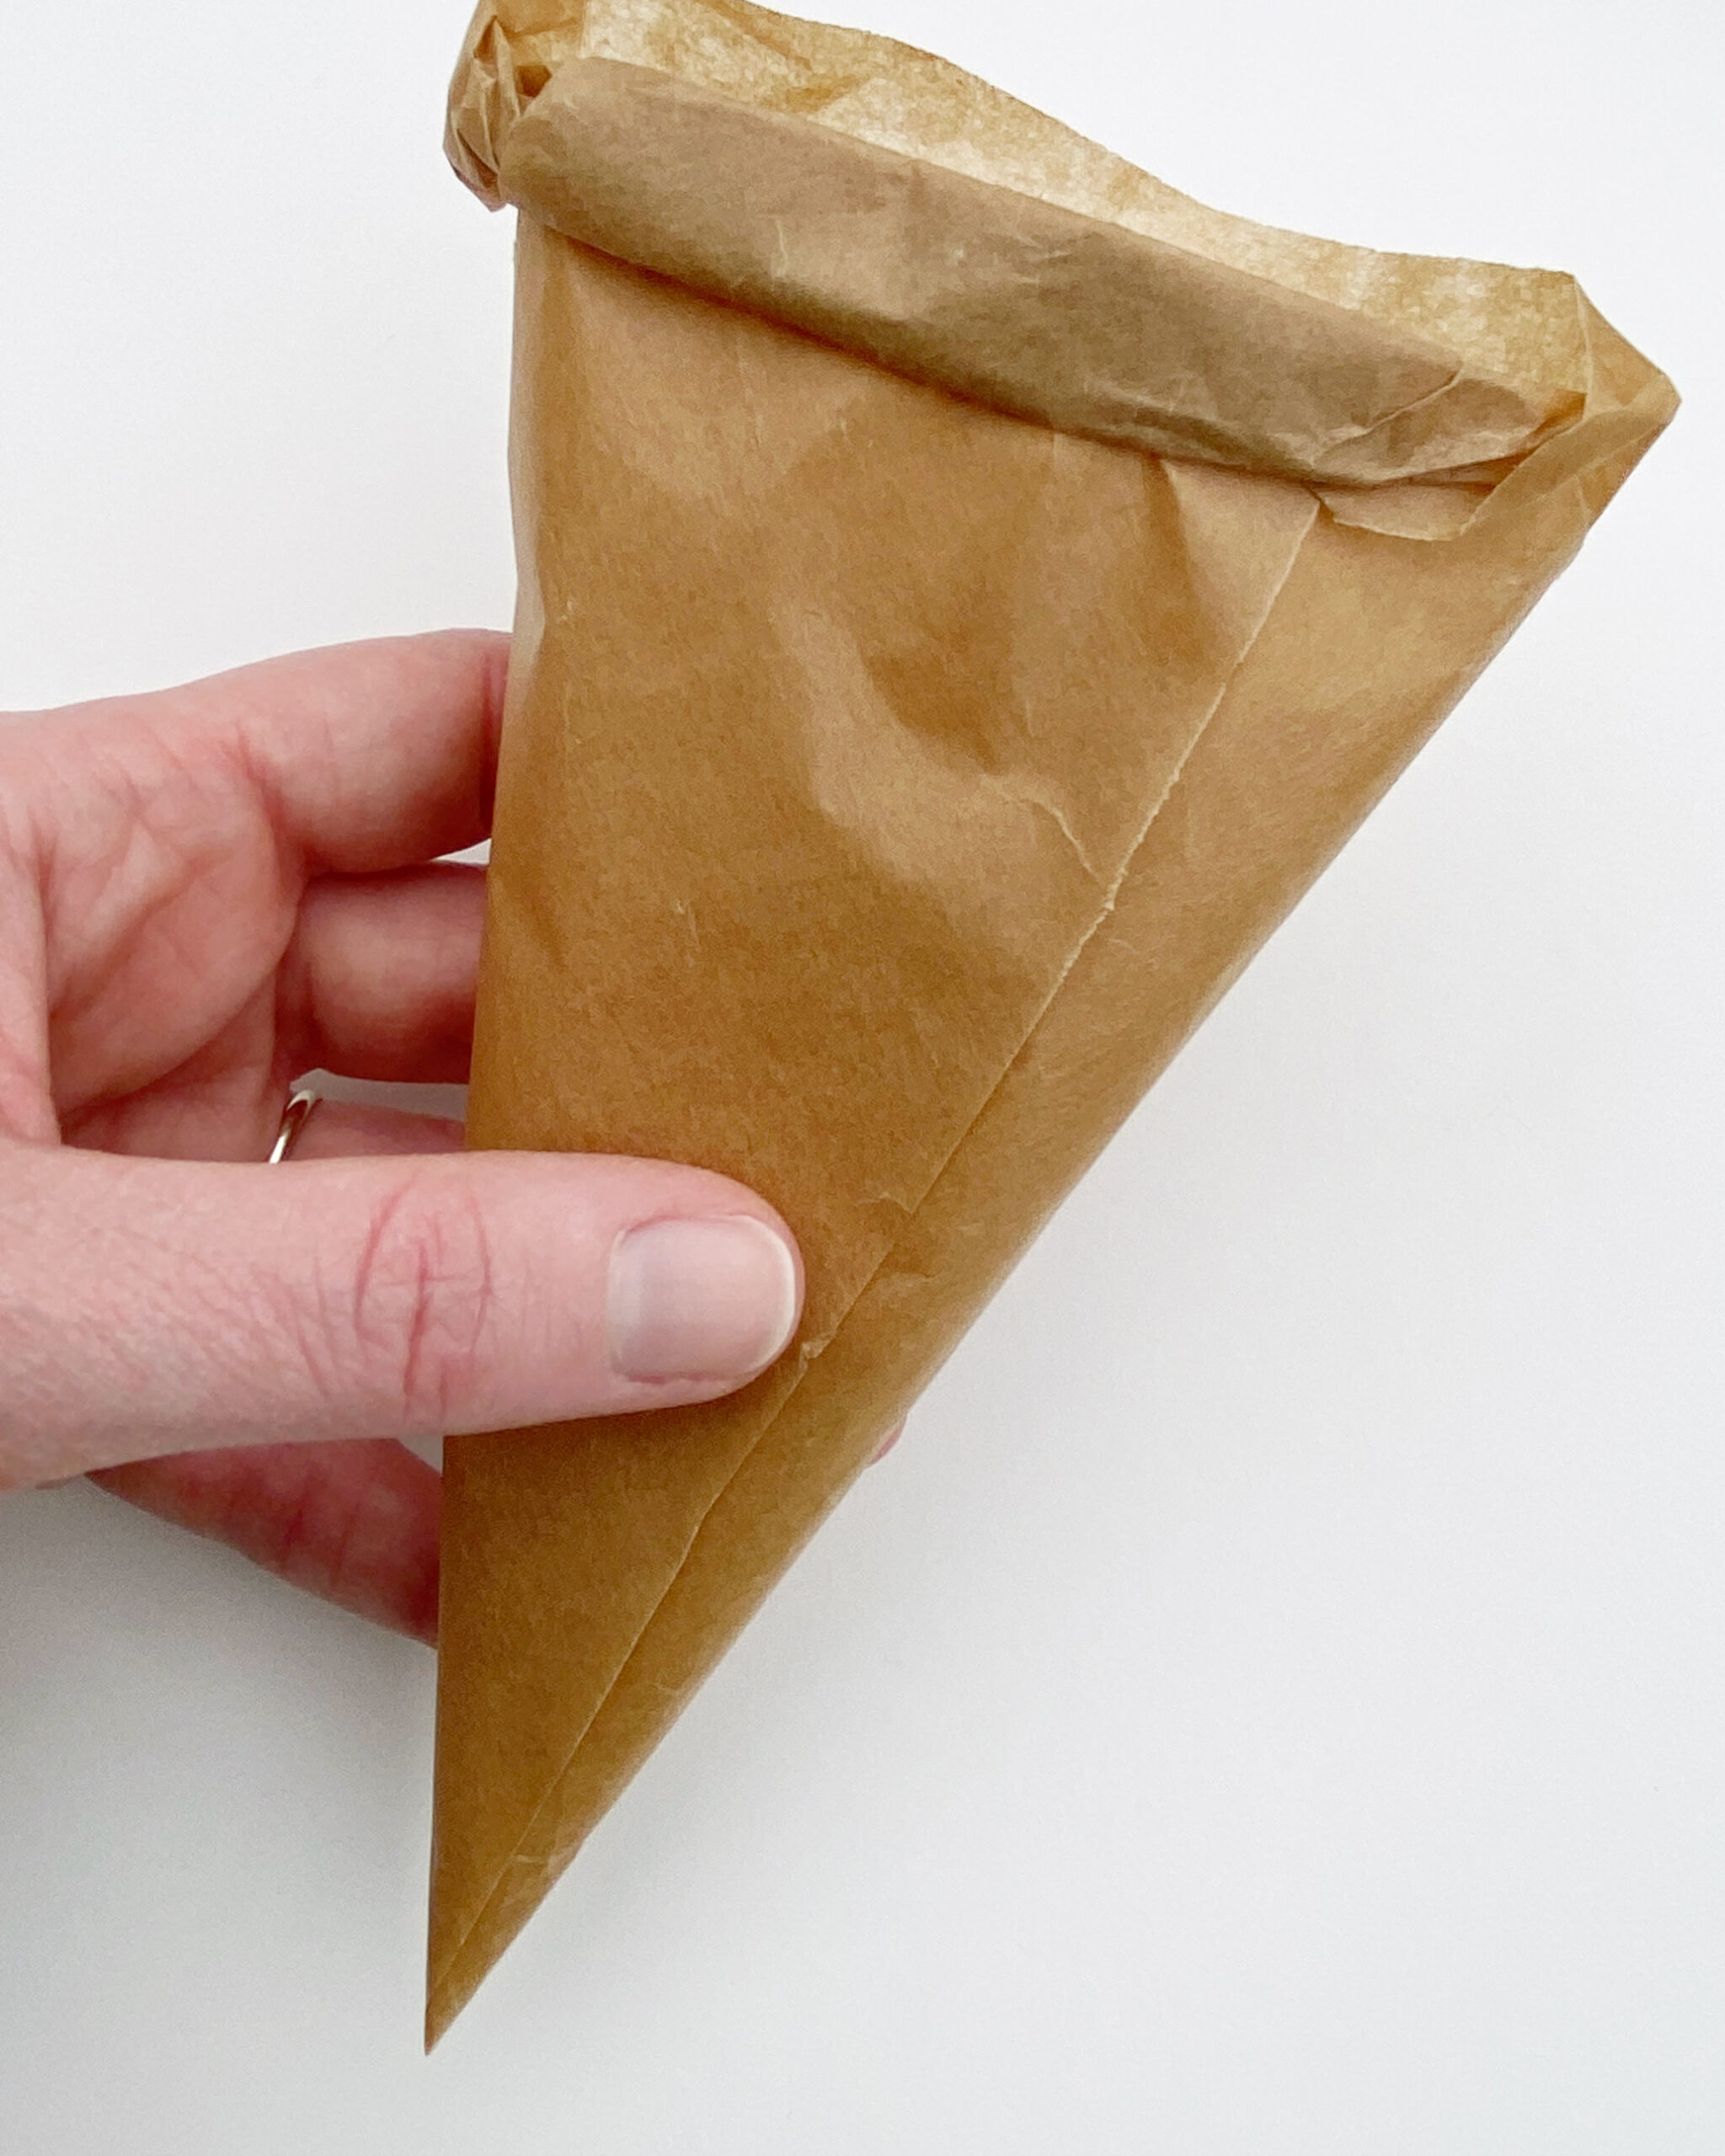
Carefully place your fingers in the middle of the folded triangle (there should be four layers of paper, so you should have two layers of paper either side of your fingers). Pinch the points together, then use your other hand to shape the paper into a cone with a very sharp point at the end. You may need to wiggle and twist the cone around a bit to get the sharp piping point.
Once you’re happy with the cone shape, fold the top edge of the cone over a few times – to secure the loose ends of the paper.
You’ll need one piping bag per colour of chocolate you’re going to use.
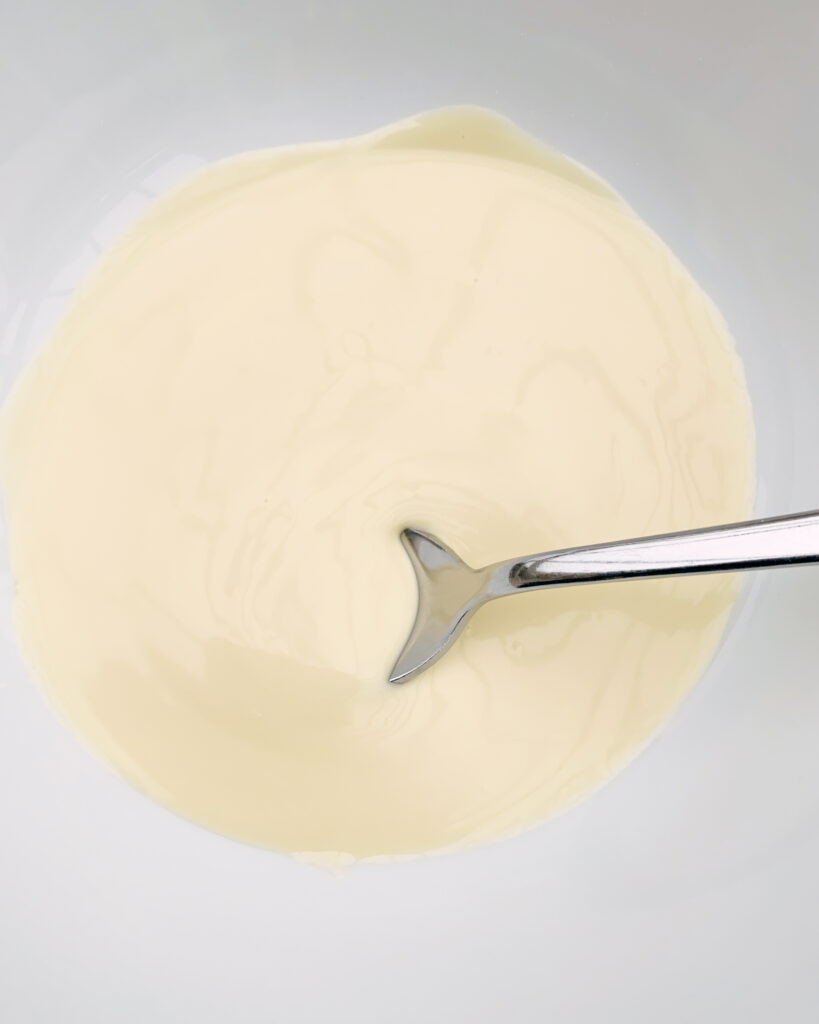
Step Five: Melt your white chocolate. It’s best to do this slowly and carefully, so you don’t burn the chocolate or make it too runny. Place a heatproof bowl on top of a smaller bowl half full of boiling water – creating a bain-marie. Then break your chocolate into small squares and place them in the top bowl. Stir the melting chocolate every now and then with a teaspoon until the chocolate is almost completely melted but still has a couple of small lumps. Remove from the hot water bowl, and continue stirring – this helps to temper the chocolate slightly. Alternatively, you can melt your white chocolate in the microwave using short bursts, but be really careful not to over do it.
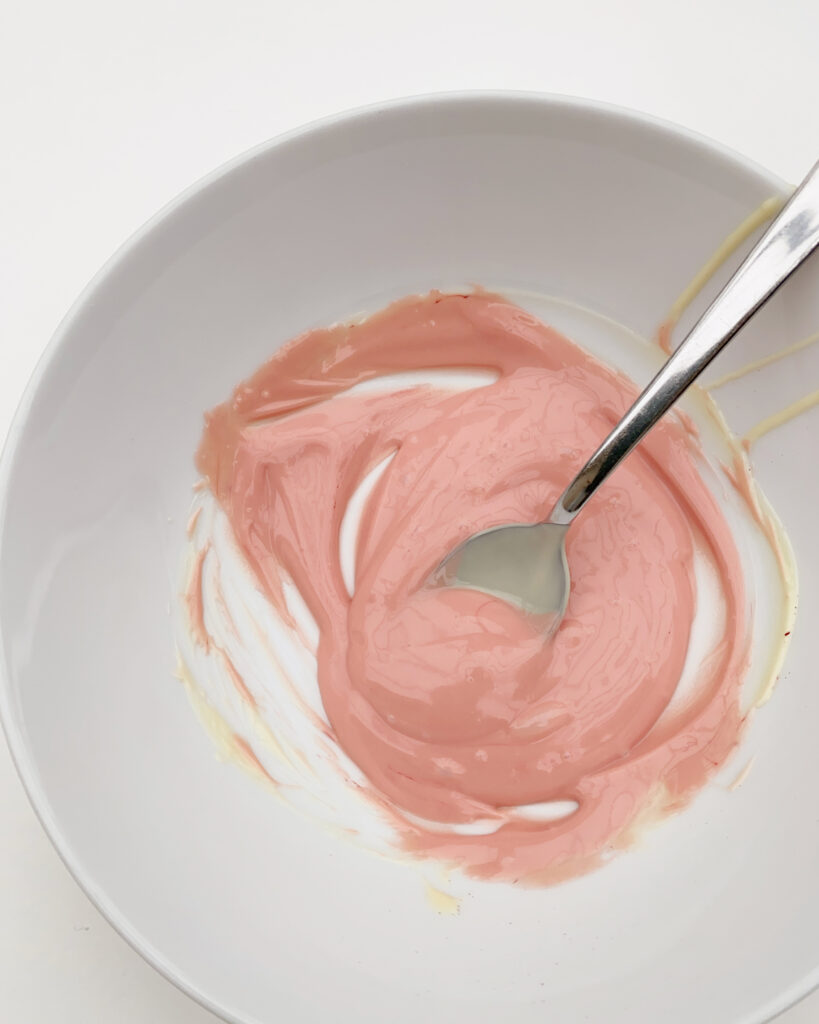
Step Six: Divide the white chocolate into separate bowls – one for each colour you want to use – keeping some as un-coloured white chocolate if you want. Then, using a little at a time, add the food colouring powders and stir well until you have your desired colours.
Step Seven: Carefully spoon one chocolate colour into a piping bag. As you haven’t yet cut the piping point, it shouldn’t leak out. Then fold the top edge of the piping bag over a few times to secure the chocolate inside. It’s best to only work with one colour and one piping bag at a time, otherwise the chocolate will set inside the piping bags before you have a chance to use them.
Step Eight: Once you are ready to start piping, carefully snip the very tip of the piping bag point. You really do only need a small hole to pipe through so err on the side of caution (you can always make the hole bigger if you need to). If you’re using our flower template, you’ll need a smaller hole for middle size flower than you do for the larger flower, and you’ll need a really tiny hole (the smallest you can manage) for the smallest flower template.
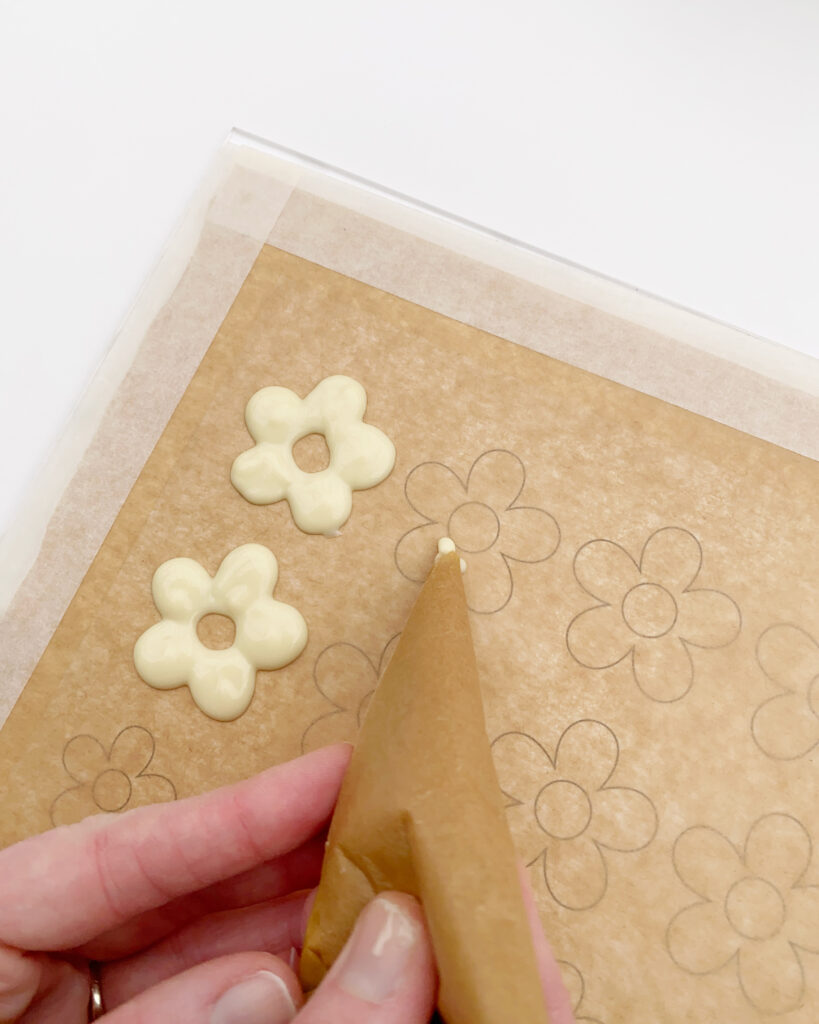
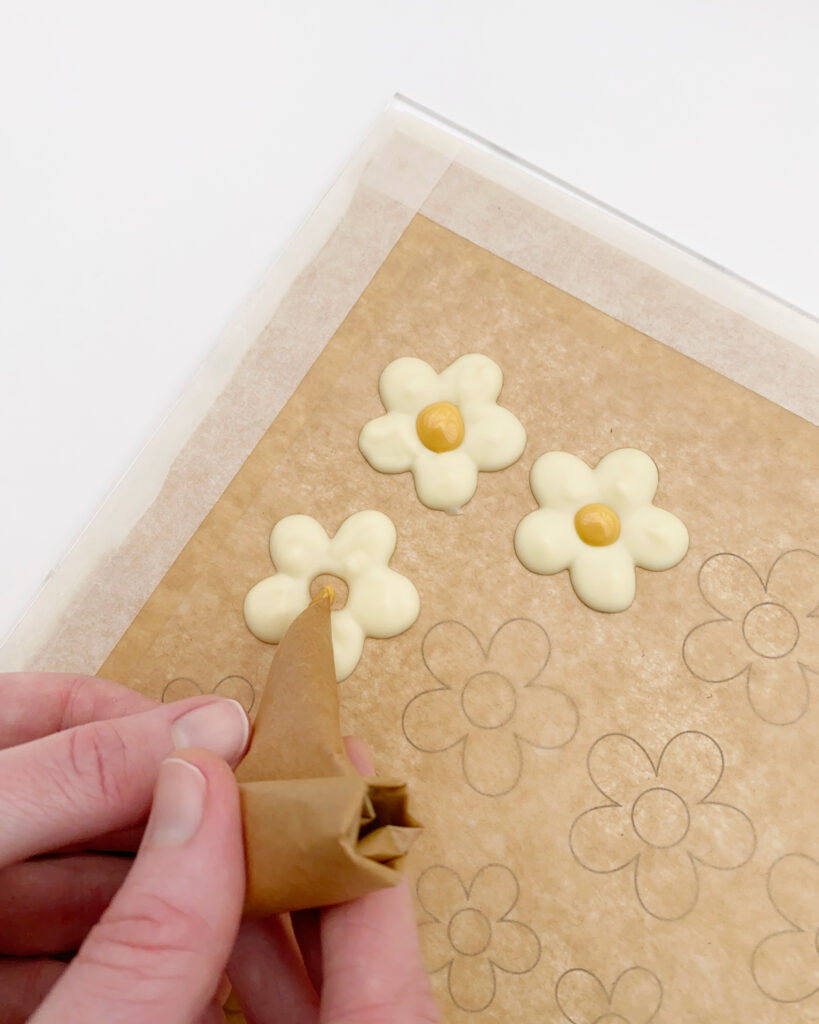
Step Nine: Hold the piping bag in your dominant hand, with your thumb keeping the top fold secure, and use your non-dominant hand to guide the point. Very gently squeeze the top of the bag (the folded end) to pipe out the chocolate – following the template.
For the large and middle flower template – pipe the petals first. Then, once the petals are lightly set, you can pipe the centres in a different colour.
For the smallest flower template – try to keep a thin but steady flow of chocolate as you pipe, following the template lines, letting it fall into place rather than pushing it. This can take a bit of practice.
Step Ten: Put your decorations to one side to completely set. On a cool day this may only take a couple of hours, on a warm day it will take longer (you might even have to use the fridge). If possible, leave them overnight to really harden.
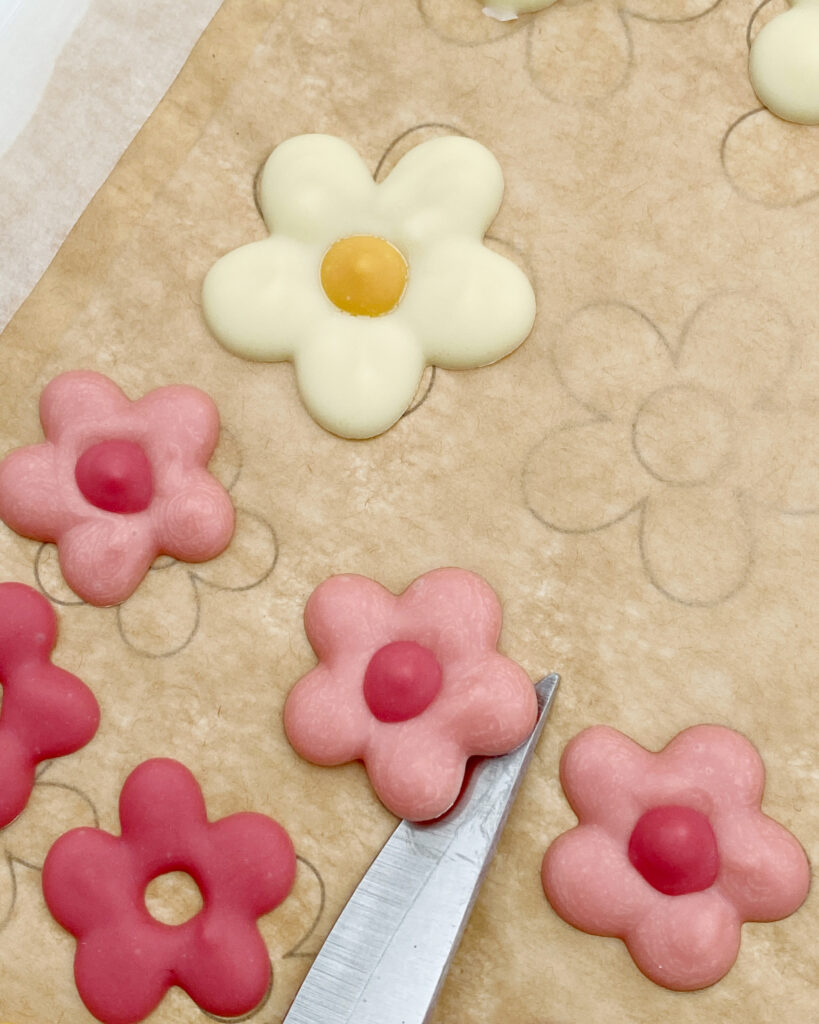
Step Eleven: Once you’re ready to use your piped chocolate decorations, simply slide a knife under each transfer and it should easily lift from the non-stick baking paper. You can then place or stick the flowers to whatever you fancy and… ta-da!… your piped chocolate flower decorations will make any treat look even better.
~ You don’t need to use cooking chocolate or anything particularly special, but as the decorations are intended to be eaten once finished, it’s a good idea to use a chocolate you enjoy.
~ I personally don’t worry about strict tempering rules when making piped chocolate runouts and it’s never been an issue for me. If, however, you really want that perfect glossy shine, or if you’re having problems with the transfers setting properly, you’ll need to carefully temper the chocolate. You can find guides and temperatures online.
~ Be careful not to add too much food colouring powder too soon or you could cause the chocolate to suddenly harden. However, if, at any point, the chocolate does start to set – simply place the bowl back on top of the hot-water bowl until the chocolate melts again.
~Do NOT use liquid or gel food colouring, unless it’s specifically designed to colour white chocolate. The wrong colouring could cause the chocolate to seize (go clumpy and grainy), split, or prevent it from setting.
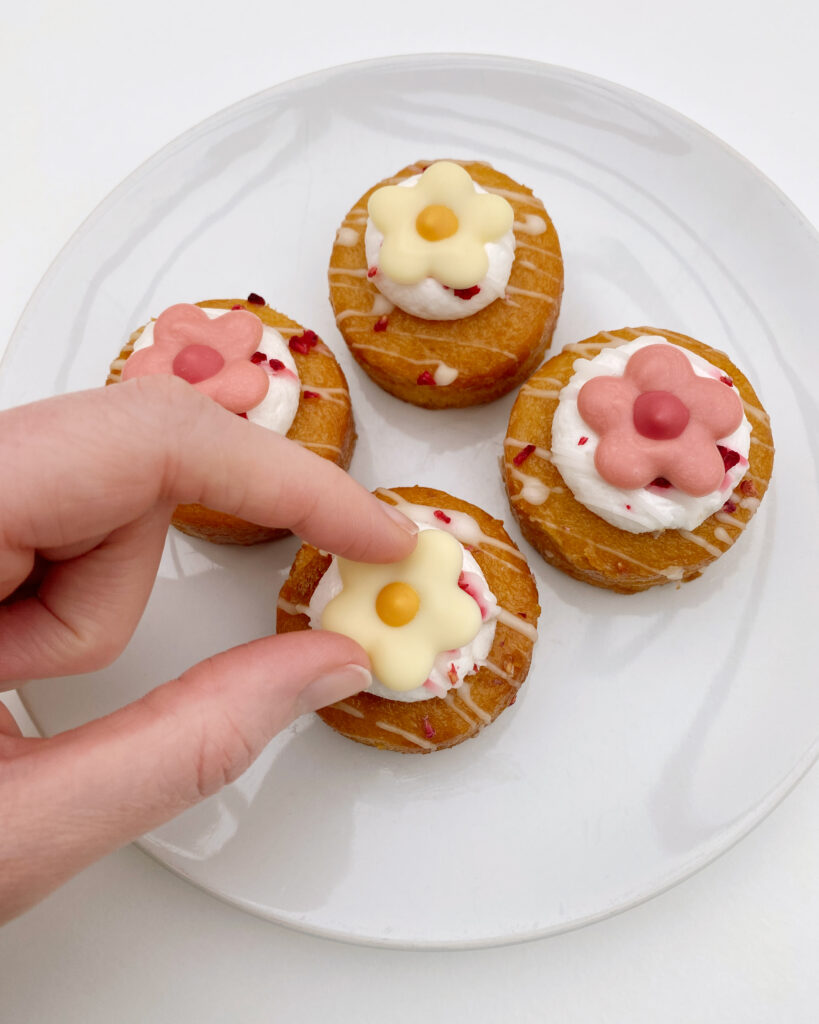
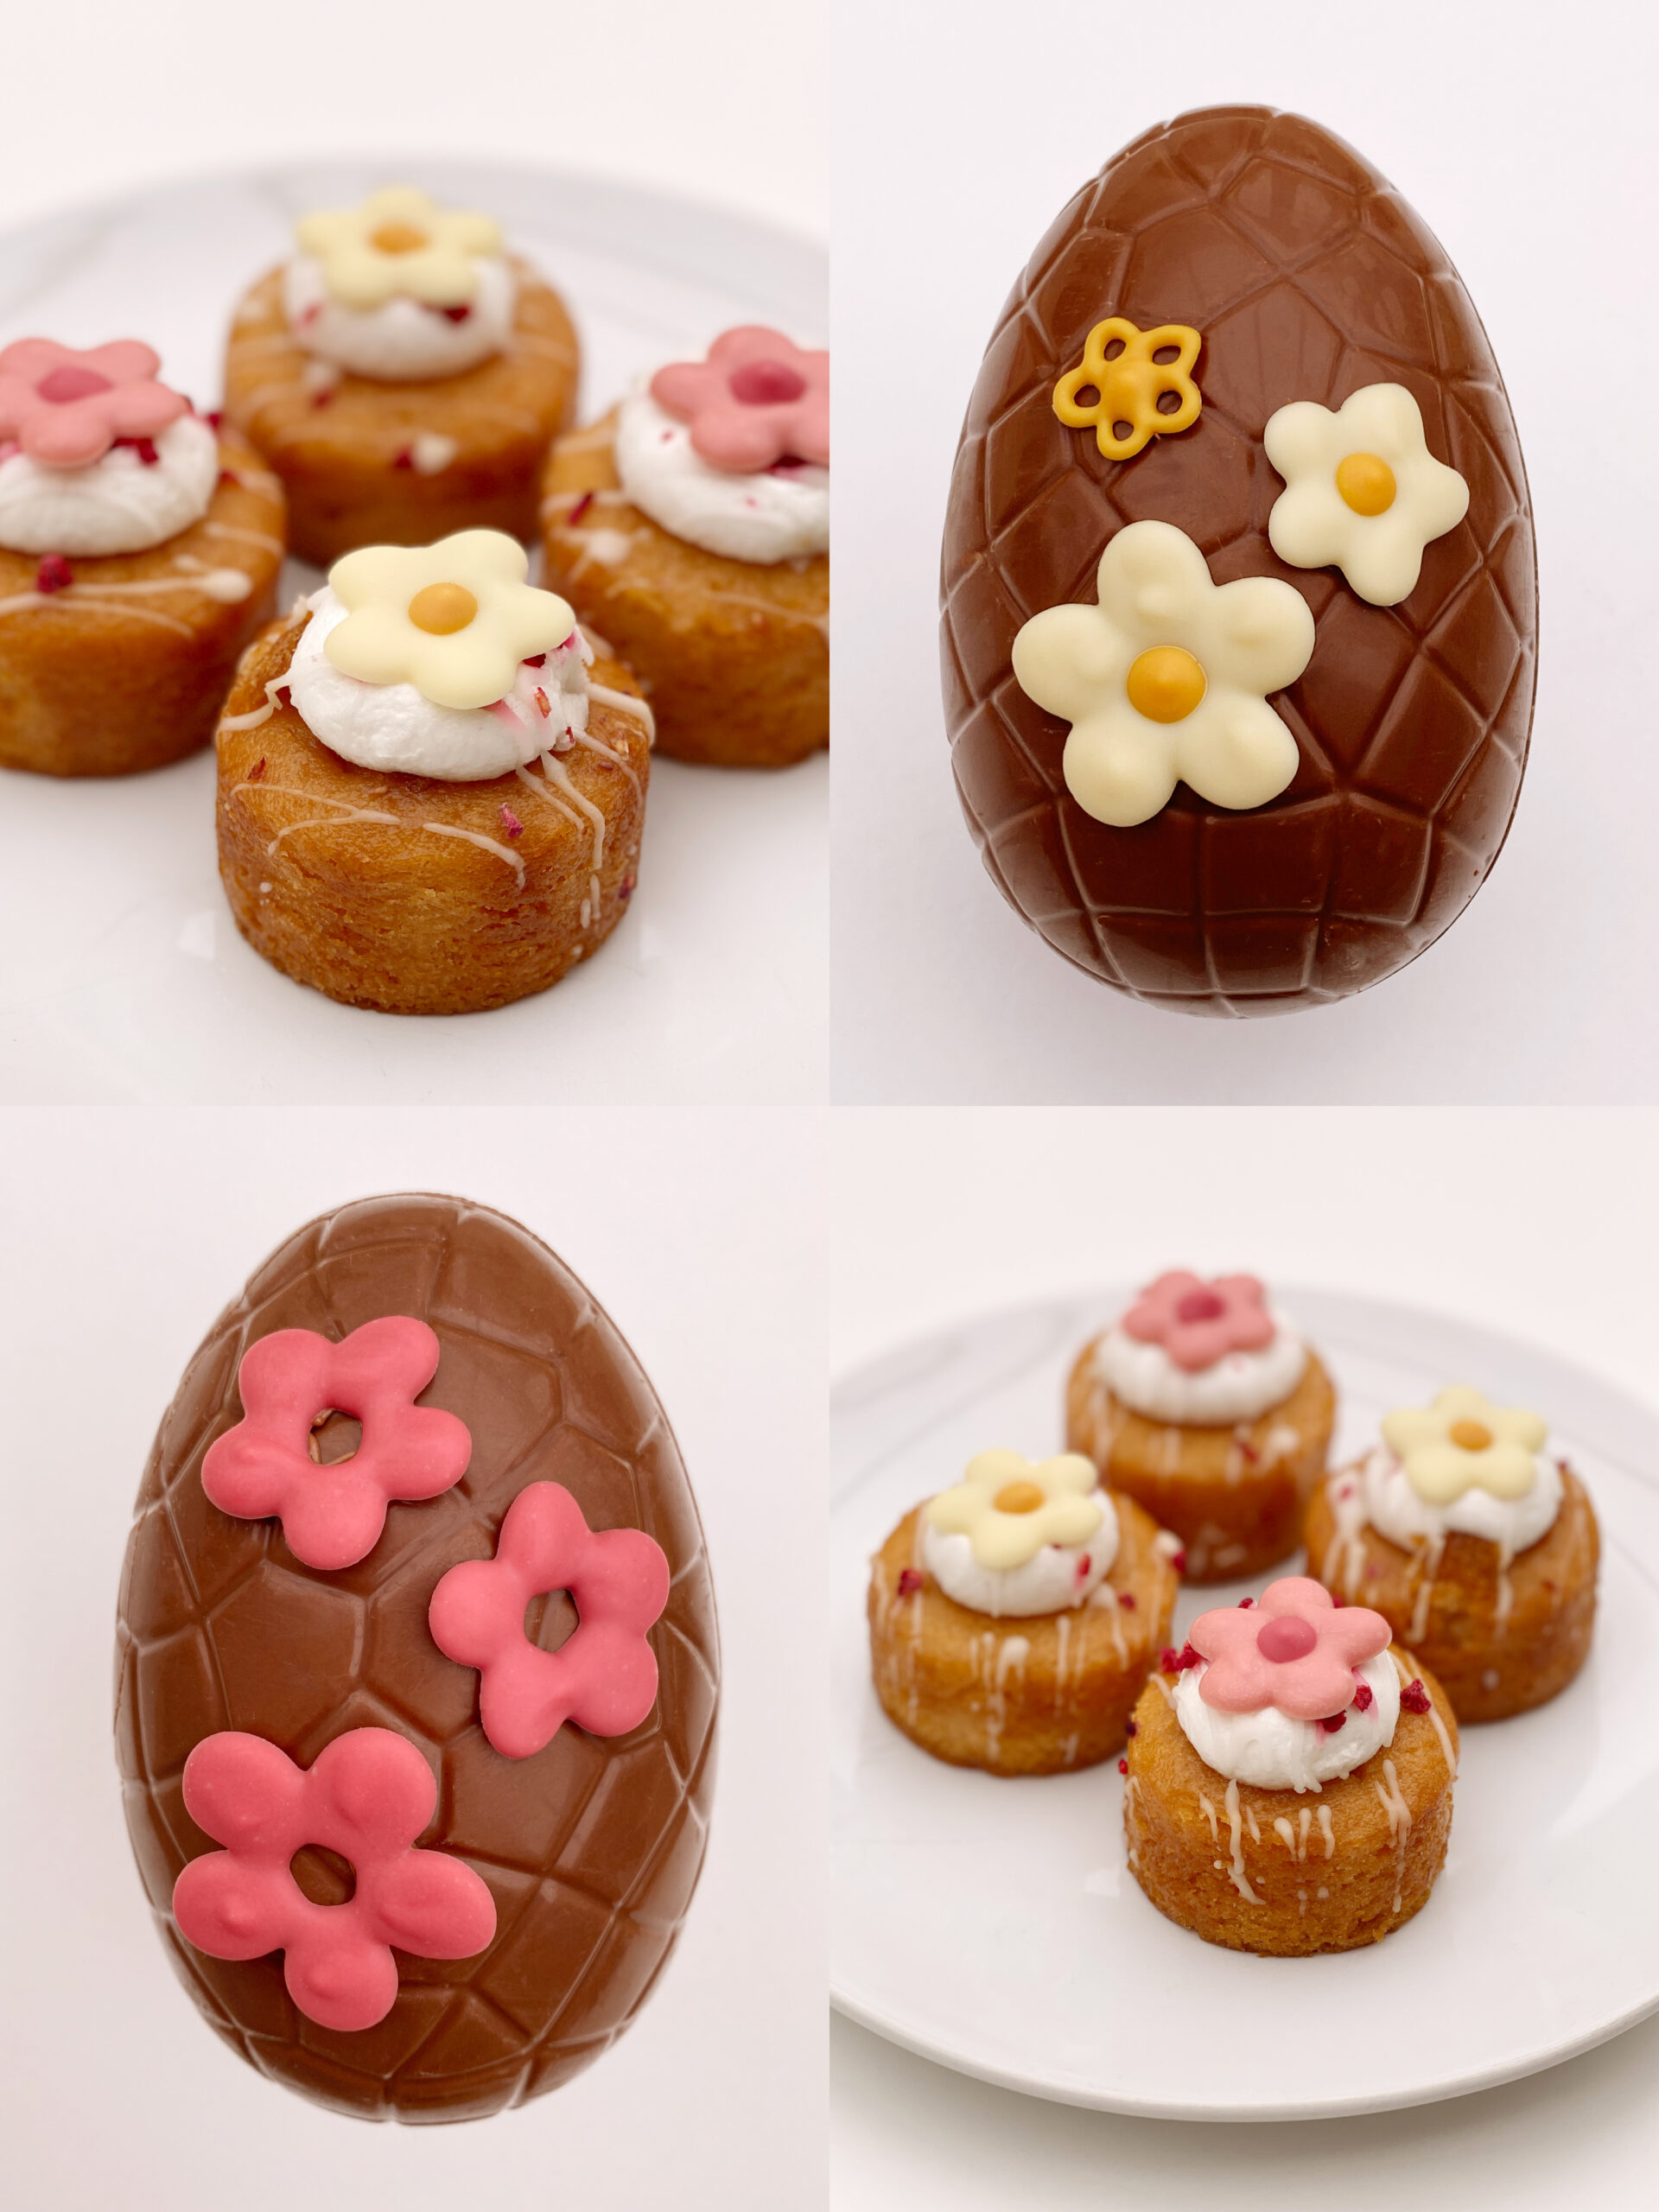
~ If you want to recreate the flowers I made… I used the medium flower template for my little cakes with un-coloured chocolate for the petals and a yellow centre on one flower, and pink chocolate for the petals with a darker pink centre on the other flower. For my Easter Eggs, I used all three template sizes; for one egg I used un-coloured petals with yellow centres and yellow for the small flowers, and on the other egg I used dark pink for the medium and large sizes (leaving the centres empty).
~ If your chocolate starts to set in a piping bag before you’ve finished using it, don’t panic. Simply let it set completely, then peel the bag away from the hard chocolate. Melt the chocolate again as before, and fill a new piping bag.
~ If you go wrong with your piping or don’t like a decoration, let it set slightly, then scrape it off the baking paper with a knife and try again.
~ The set chocolate decorations keep for ages (as long as you’d expect chocolate to last), so you can make them ahead of time and store in a food-safe container, somewhere cool, until you’re ready to use them.
~ Buttercream icing is great for sticking the transfers to cakes – you could also try different icings/frostings. Whipped cream or melted chocolate works well for desserts. And melted chocolate is best when sticking to Easter Eggs (use the same type of chocolate as the egg – so milk chocolate for a milk chocolate egg, dark for dark etc.).
I’d love to see your piped chocolate flower decorations if you give them a try. Share your photos and videos on Instagram and tag us @forcreativessake (make sure you also send us a DM if your account is private, so I don’t miss it!).
Kerri x
*For personal use, UK residents, and those over the age of 18 only. Click here for full terms & conditions.
If you haven’t already found us over on Instagram – why not come say hi and give us a follow. We would love for you to join the conversation and help spread the movement by liking and sharing our content.

Any and all opinions expressed by third parties in our content are not necessarily the opinions of FCS. All FCS content, including content provided by third parties, is intended for general guidance and inspiration. Third-party products and services mentioned in content have not necessarily been tested by FCS. Any content feature, mention of a third-party product or service, or link to a third-party business and/or external site, does not suggest an endorsement from, or affiliation with, FCS. FCS is never paid (or directly compensated) for any features, opinions, or information provided in our content about any third-party services, products, sites or miscellaneous topics – unless clearly stated otherwise.

